Prevention, Treatment, Performance

Educational videos from the FIFA Medical Network (@FIFAMedical): Rehabilitation exercises for common football injuries

Recently Justin (@backtoyourfeet) was asked to help make some short educational videos for the FIFA Football Medical Network with @DrMarkFulcher. Here is a collection of the videos that are available on FIFA Medical Networks Twitter page (@FIFAMedical).

The first collection of videos demonstrate how to do some rehabilitation exercises for common football injuries. It is a great idea to see your physiotherapist as soon as you have an injury. They can diagnose what has happened, refer you for investigations or to specialists if necessary and give you great advice on what to do in the acute phase of the injury to help you get back to what you love doing.

The Muncie Straight Leg Raise is an exercise that helps to strengthen the quadriceps muscle and can be done safely quite early after an injury.

Hamstring injuries are one of the most common injuries in football. Confirming the severity and location of the injury can help with prediction for return to sport.

Eccentric exercises targeting the hamstring muscles have been shown to significantly reduce the risk of sustaining a hamstring injury, but have also shown to reduce the risk of re-injuring you hamstring. Doing the exercises regularly increases the chance of them being effective.

Patallae tendinopathy can cause pain in the anterior aspect of the knee, and often affect players who are more dynamic and can jump higher than their peers. As with most tendinopathies it is caused when the tendon is exposed to more load than it has capacity to cope with. Using a decline board helps to load the patallae tendon.

Managing Achilles tendinopathies can be frustrating for players as it can be difficult to get the balance of how much loading activities like running and jumping the tendon can tolerate before it gets aggravated. Isometric exercises can be used as a way of loading the tendon early in the rehabilitation process or during the season when the player has a high playing load.

Groin injuries can be frustrating for players and therapists. You can prevent groin injuries by doing the Copenhagen Adductor Exercise regularly.

If you have had a long-standing groin injury, then the 10-week Holmich Protocol has been proven to be effective as a treatment. It was first described in 1999 by Per Holmich in The Lancet (Hölmich et al., 1999) but is still one of the most validated programmes for footballers who have chronic adductor-related groin pain. There are two phases to the protocol, and they include exercises to build strength in the hip adductors, abdominals, glute’s and lower back.

The first phase of the @PerHolmich protocol can be used to help manage a player with adductor-related groin pain. Do you know how to initiate this rehabilitation programme? #FootballNetwork #FIFADiploma pic.twitter.com/lVCDKYdGl1

— FIFA Medical Network (@FIFAMedical) December 16, 2019

The second phase of the Holmich protocol is used to progress a player’s strength and improve function. Do you know what it involves? Have a look at this clip to see. #FootballNetwork #FIFADiploma pic.twitter.com/S68h3p2lFJ

— FIFA Medical Network (@FIFAMedical) December 23, 2019

Recently the programme was validated by (Yousefzadeh, Shadmehr, Olyaei, Naseri, & Khazaeipour, 2018) who found that the Holmich programme may be an effective treatment for long-standing adductor-related groin pain (LSAGP). However, they suggested more emphasis should be paid to the hip adductor muscles’ eccentric strength and have modified the programme to make it more effective. One of the exercises they included in their programme is the Copenhagen adductor exercise. The Copenhagen adductor exercise can reduce the risk of getting adductor injuries and should be done regularly to maximise the effect. Our Premier Football teams use the Copenhagen adductor exercise as well as the FIFA 11+ warm-up exercises to help reduce the risk of injury during the season.

When done regularly the Copenhagen adductor exercise can reduce the risk of developing groin pain by 40%. This video shows how the three progressions are done. #FootballNetwork #FIFADiploma
See the original paper from the @BJSM_BMJ to learn more: https://t.co/v6SclZeEz4 pic.twitter.com/9Z6NCVExMY

— FIFA Medical Network (@FIFAMedical) January 20, 2020

Groin pain does not just affect footballers. If you have had an adductor injury, or have groin pain that is restricting your ability to play football or achieve your calls then we would love to hear from you. Make an appointment and we can hep prescribe the best way to help you return to your sport.

References:

Hölmich, P., Uhrskou, P., Ulnits, L., Kanstrup, I.-L., Nielsen, M. B., Bjerg, A. M., & Krogsgaard, K. (1999). Effectiveness of active physical training as treatment for long-standing adductor-related groin pain in athletes: randomised trial. The Lancet, 353(9151), 439-443.
Yousefzadeh, A., Shadmehr, A., Olyaei, G. R., Naseri, N., & Khazaeipour, Z. (2018). Effect of Holmich protocol exercise therapy on long-standing adductor-related groin pain in athletes: an objective evaluation. BMJ Open Sport & Exercise Medicine, 4(1), e000343. https://doi.org/10.1136/bmjsem-2018-000343

Comprehensive rehabilitation after ankle sprains are important to reduce the risk of re-injury.

Adding in perturbation drills helps to reduce injury risk.

Tests for concussion that are commonly used in football

As part of our series of posts highlighting the informative video’s Justin Lopes from Back To Your Feet Physiotherapy did with Dr Mark Fulcher from Axis Sports Medicine for the FIFA Medical Network, this group of tweets are aimed at physiotherapists or medical professionals working with teams. These video’s show the process for the concussion assessment and demonstrate some tests for the vestibular occulomotor reflex.

The Holmich protocol for long standing adductor related groin pain

If you have had a long-standing groin injury, then the 10-week Holmich Protocol has been proven to be effective as a treatment. It was first described in 1999 by Per Holmich in The Lancet (Hölmich et al., 1999) but is still one of the most validated programmes for footballers who have chronic adductor-related groin pain. There are two phases to the protocol, and they include exercises to build strength in the hip adductors, abdominals, glute's and lower back.

Recently the programme was validated by (Yousefzadeh, Shadmehr, Olyaei, Naseri, & Khazaeipour, 2018) who found that the Holmich programme may be an effective treatment for long-standing adductor-related groin pain (LSAGP). However, they suggested more emphasis should be paid to the hip adductor muscles' eccentric strength and have modified the programme to make it more effective. One of the exercises they included in their programme is the Copenhagen adductor exercise. The Copenhagen adductor exercise can reduce the risk of getting adductor injuries and should be done regularly to maximise the effect. Our Premier Football teams use the Copenhagen adductor exercise as well as the FIFA 11+ warm-up exercises to help reduce the risk of injury during the season.


Groin pain does not just affect footballers. If you have had an adductor injury, or have groin pain that is restricting your ability to play football or achieve your calls then we would love to hear from you. Make an appointment and we can hep prescribe the best way to help you return to your sport.

Schedule an appointment


References:

Hölmich, P., Uhrskou, P., Ulnits, L., Kanstrup, I.-L., Nielsen, M. B., Bjerg, A. M., & Krogsgaard, K. (1999). Effectiveness of active physical training as treatment for long-standing adductor-related groin pain in athletes: randomised trial. The Lancet, 353(9151), 439-443.
Yousefzadeh, A., Shadmehr, A., Olyaei, G. R., Naseri, N., & Khazaeipour, Z. (2018). Effect of Holmich protocol exercise therapy on long-standing adductor-related groin pain in athletes: an objective evaluation. BMJ Open Sport & Exercise Medicine, 4(1), e000343. https://doi.org/10.1136/bmjsem-2018-000343

ACL Injury – Prevention, rehabilitation and reducing the risk of re-injury when return to play

If you play a sport that involves a lot of cutting, turning or change of direction then there is a risk of sustaining an injury to an important ligament in your knee called the Anterior Cruciate Ligament (ACL).  This can happen in contact and non contact situations. During football (soccer) the most common way to injure your ACL is during non contact situations.  These injuries happen when the body is unable to control the forces that come through the knee, either because of poor technique in the way you change direction, weakness in the muscles around the knee and hip, wearing the wrong type of footwear for the field you are playing on, or fatigue.

Females tend to injure their ACL’s more commonly than males in football.

ACL’s can be stretched (a grade 1 or grade 2 injury) or if there is enough force ruptured (grade 3 injury). Once an ACL has ruptured it does not rejoin or regrow.

What are the symptoms of an ACL injury?

Every incident is different and the ACL can be injured in contact and non contact situations.  The ligament can also be injured in isolation, or there can be damage to other structures within the knee joint and to the ligaments that stabilise the knee.  The ‘text book’ story of an ACL injury is when the athlete changes direction, the knee callapses and they hear a ‘pop’ from within the knee, and the knee subsequently swells up.  Other symptoms can include:

  • pain in the knee when you put weight through it
  • pain and loss of movement at end range of knee flexion or extension
  • feeling of instability or giving way

Can you prevent ACL injuries from happening?

Yes, it appears that we can reduce the risk of getting an ACL injury.  There have been a number of studies that have shown that by doing a consistent warm up such as the FIFA 11+ or the PEP programme a couple off times a week reduces the risk of injuring your ACL.  This is because they include strengthening exercises and neuromuscular control exercises as part of the warm up.  Increasing your knee flexion angle (bending your knee more) when changing direction appears to reduce the risk of non-contact ACL injuries.  Wearing the correct shoes for the field you are playing on can make a difference because if you are using shoes that have too much traction or grip then your foot can get stuck and the forces can go up to the knee.   Practicing change of direction and agility exercises when fatigued may reduce ACL injuries.

What should you do if you suspect you have injured your ACL?

In the acute situation the current recommendation is to apply RICED management:

Rest (from running / sport etc… if you can take weight comfortably through the leg then you can walk on it) but crutches can be useful to make it more comfortable to weight bear.

Ice (you can use crushed ice in a bag for 10-15 minutes at a time, with something like a food cling wrap or a damp tea cloth between the ice and your skin to reduce the risk of ice burns). Repeat every couple of hours.

Compression: Use tubigrip or an elastic bandage

Elevation: Keep the knee elevated to try and reduce swelling

Diagnosis: It is important to see a physio or your GP to get an accurate diagnosis and so you can start your management plan as soon as possible.

You can book an appointment with one of our therapists by clicking here.

What can your Physio do in the acute period after an ACL injury?

Physiotherapists are trained in the diagnosis an management of ACL injuries.  They can refer you for an X-ray and to Sport and Exercise Medicine Specialists or Orthopedic Surgeons to get an MRI to confirm the ACL rupture and to investigate the extent of damage to other structures in the knee such as articular cartlidge, meniscus, ligaments, tendons and muscles.

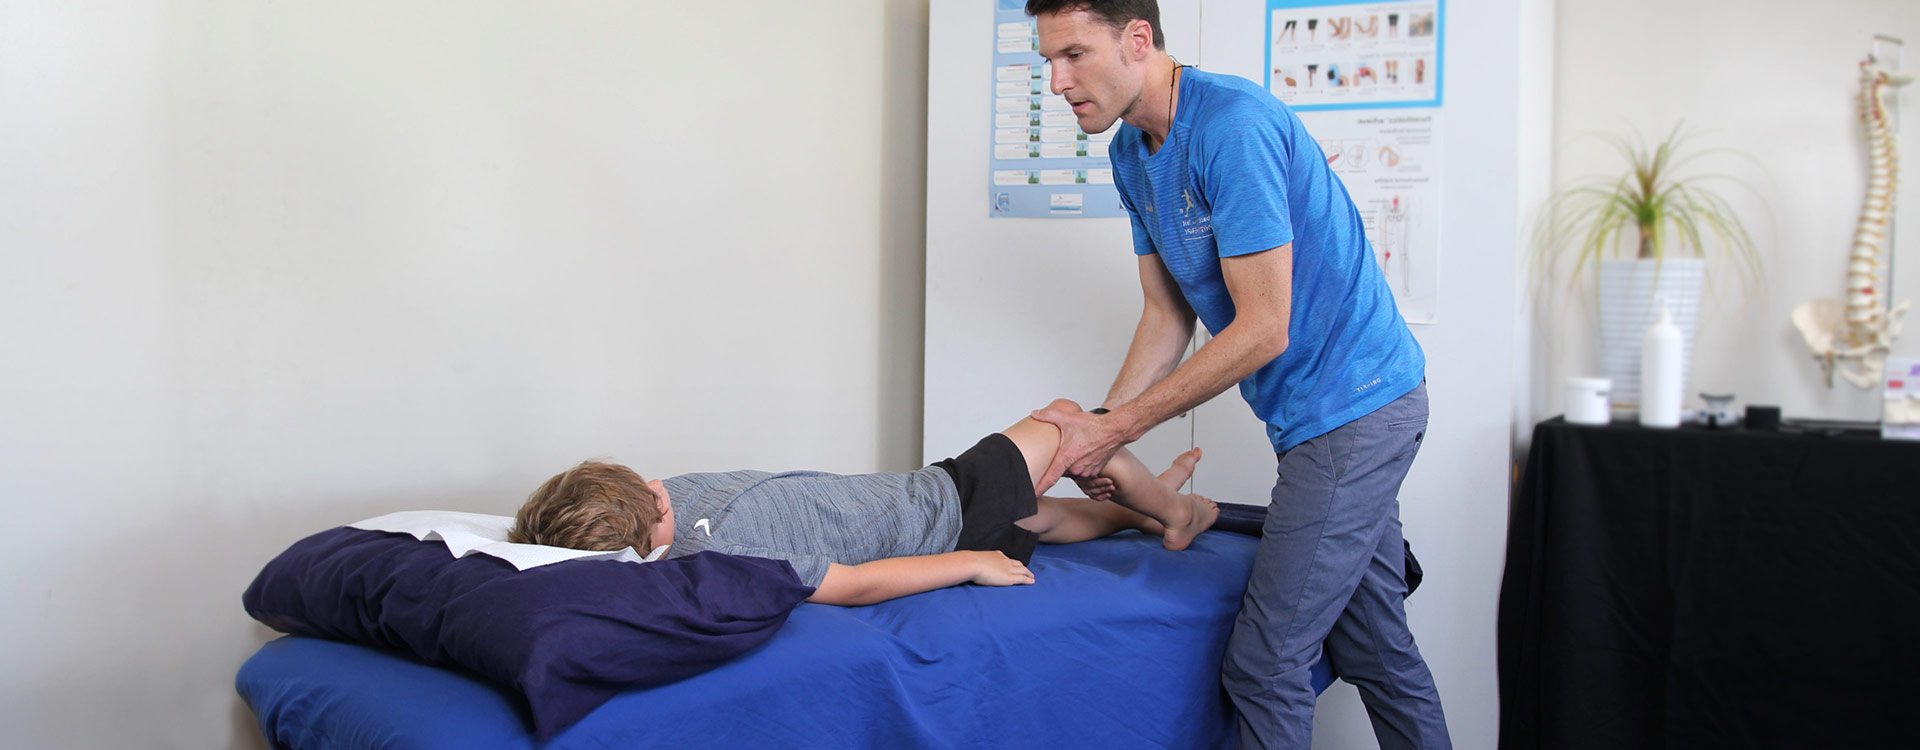
Make an appointment with your physio as soon as possible.  They can help you improve and maintain the movement in your knee, reduce your pain and safely get you moving.  They can provide crutches, education and advice and give you strategies to reduce muscle wasting that can happen if you don’t keep exercising and using your leg.

Should you have surgery if you have ruptured your ACL?

There is a trend in sports medicine to try conservative rehabilitation for an ACL injury rather than immediately have an ACL reconstruction surgery.  It is important to start your rehabilitation straight away to reduce muscle wasting and There are a number of factors that can affect your decision to have an operation and an open and honest dialogue with your physiotherapist and orthopaedic surgeon is important to make the right decision for you.  The indication for surgery is usually failed conservative management (where you have gradually tried to return to change of direction sports but the knee gives way or is unstable).

Allowing the inflammation and swelling on your knee to go down and getting full range of movement before having an operation is important.

Post surgical rehabilitation for ACL injuries

After surgery your physiotherapist can guide you through the different phases of your surgeons protocol.  Progression  through the different phases can take different times for different people so we use a criteria based progression rather than time as a means of knowing when you should progress to the next stage.

Rehabilitation initially is targeted at getting your range of movement back, getting you walking without a limp and using strengthening and balancing exercises to get your muscles working again.

Progressively challangeing your muscles to get stronger, retraining your running movement pattern, improving your balance and getting confident to hop and stop and change direction is all started once you have been cleared to do so by your surgeon.

We use video feedback to help give our clients information on how they are moving and to help retrain them to move in a more biomechanically advantageous way. We also train our athletes to be able to pass a return to function test before we progress to any high tempo change of direction activities.  This includes but is not limited to:

  • Single leg hop test
  • Single leg triple hop test
  • Single leg triple cross over hop test
  • Single leg drop and vertical hop test
  • Single leg leg press exercise 3 Rep Max test

Our sessions are one on one and we take our athletes out onto the field to help improve their technique and confidence in running in straight lines, changing direction, gradually progressing their on field movement patterns through speed and introducing perturbations and ballwork before clearing them to return to team training.

We also offer a group based Balance And Strength Exercise Training (BASE Training) bootcamp a couple of mornings a week to help build fitness, strength and to improve biomechanics.

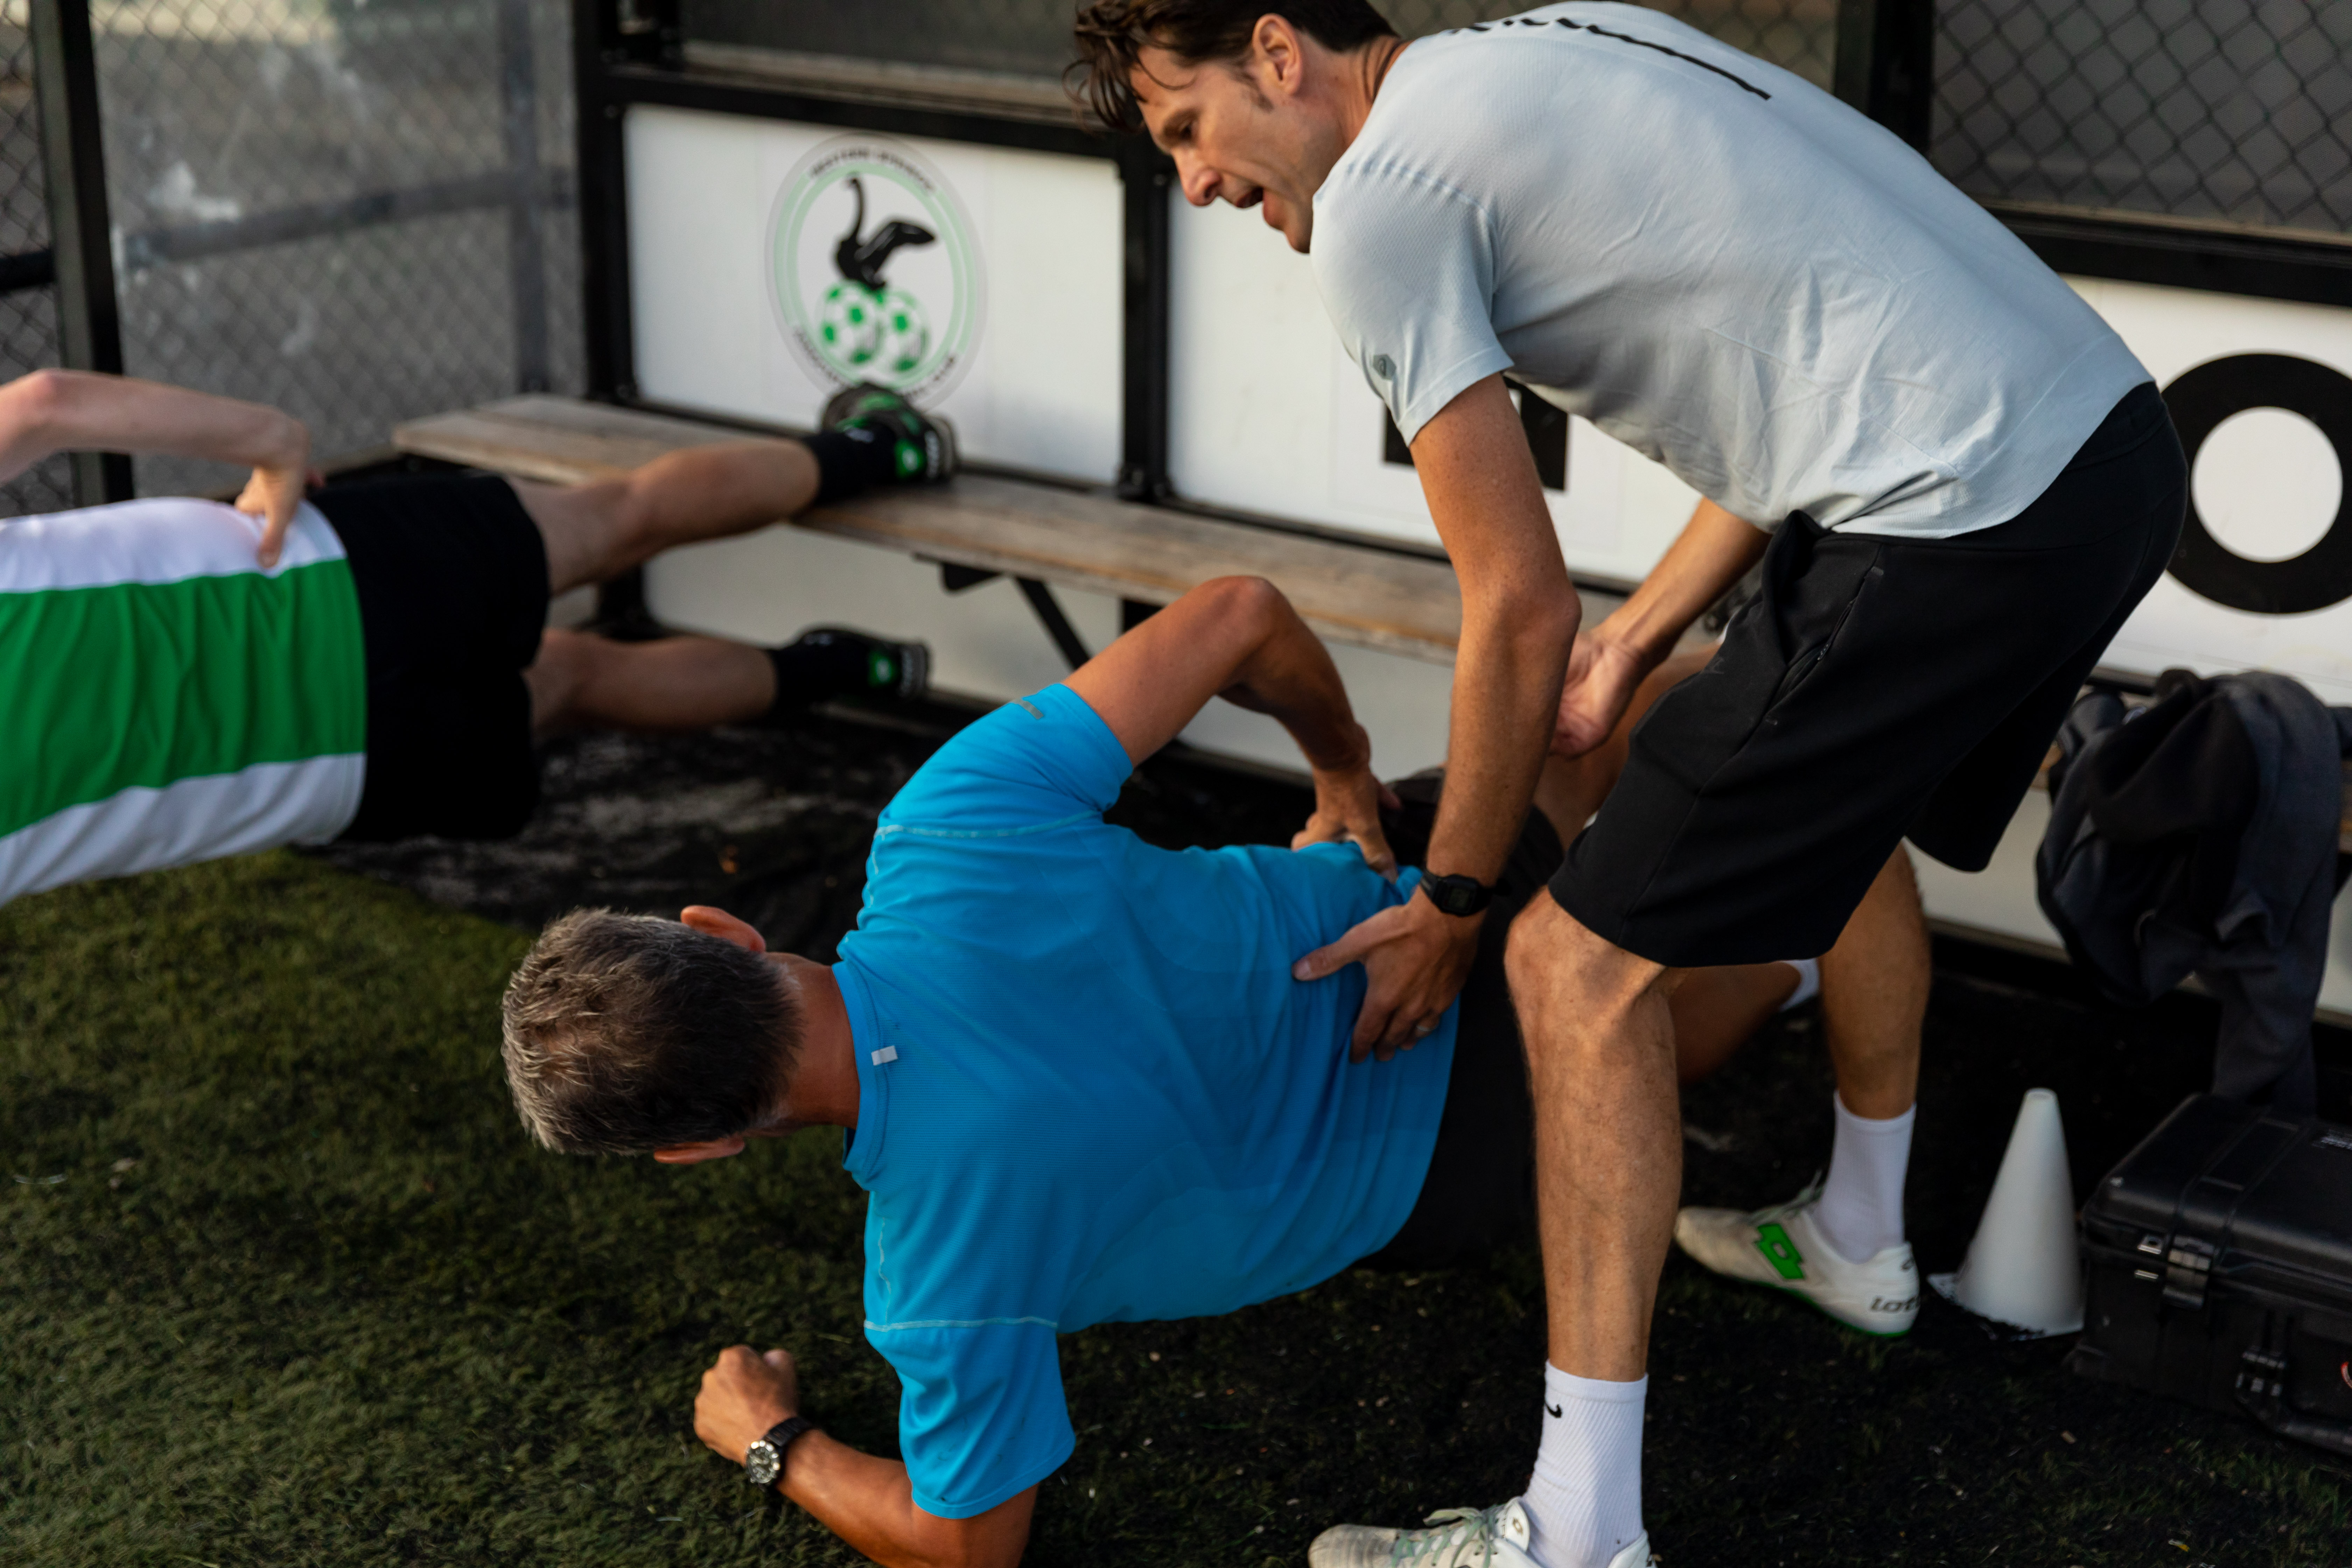
BASE Training – an example of functional rehabilitation in a group setting

If you would like an assessment or help on the way to restoring the functional stability of your knee get in touch. We will get you Back To Your Feet!!

References:

Bizzini, M., Hancock, D., Impellizerri, F. Suggestions From the Field for Return  to Sports Participation Following Anterior Cruciate Ligament Reconstruction: Soccer. J Orthop Sports Phys Ther 2012;42(4):304-312. doi:10.2519/jospt.2012.4005

Meierbachtol, A., Rohman, E., Paur, E., Bottoms, J., & Tompkins, M. (2017). Quantitative Improvements in Hop Test Scores After a 6-Week Neuromuscular Training Program. Sports Health9(1), 22–29. http://doi.org/10.1177/1941738116667933

First Aid kits for football

Looking after athletes on the sideline is a challenge, and at lower levels of competition when funding is limited, is often provided by sports medics or trained First Aiders. I recommend you find a local physio that can help provide services for your team, and who you can contact if you have an injury on the field. If you are unable to source a professional then doing a Sideline Sports Medic First Aid course or a First Aid and CPR course will help give you the confidence to make good decisions when someone does get injured. Making sure you plan for all the eventualities and source a good ‘kit’ so you have what you need when an injury happens.

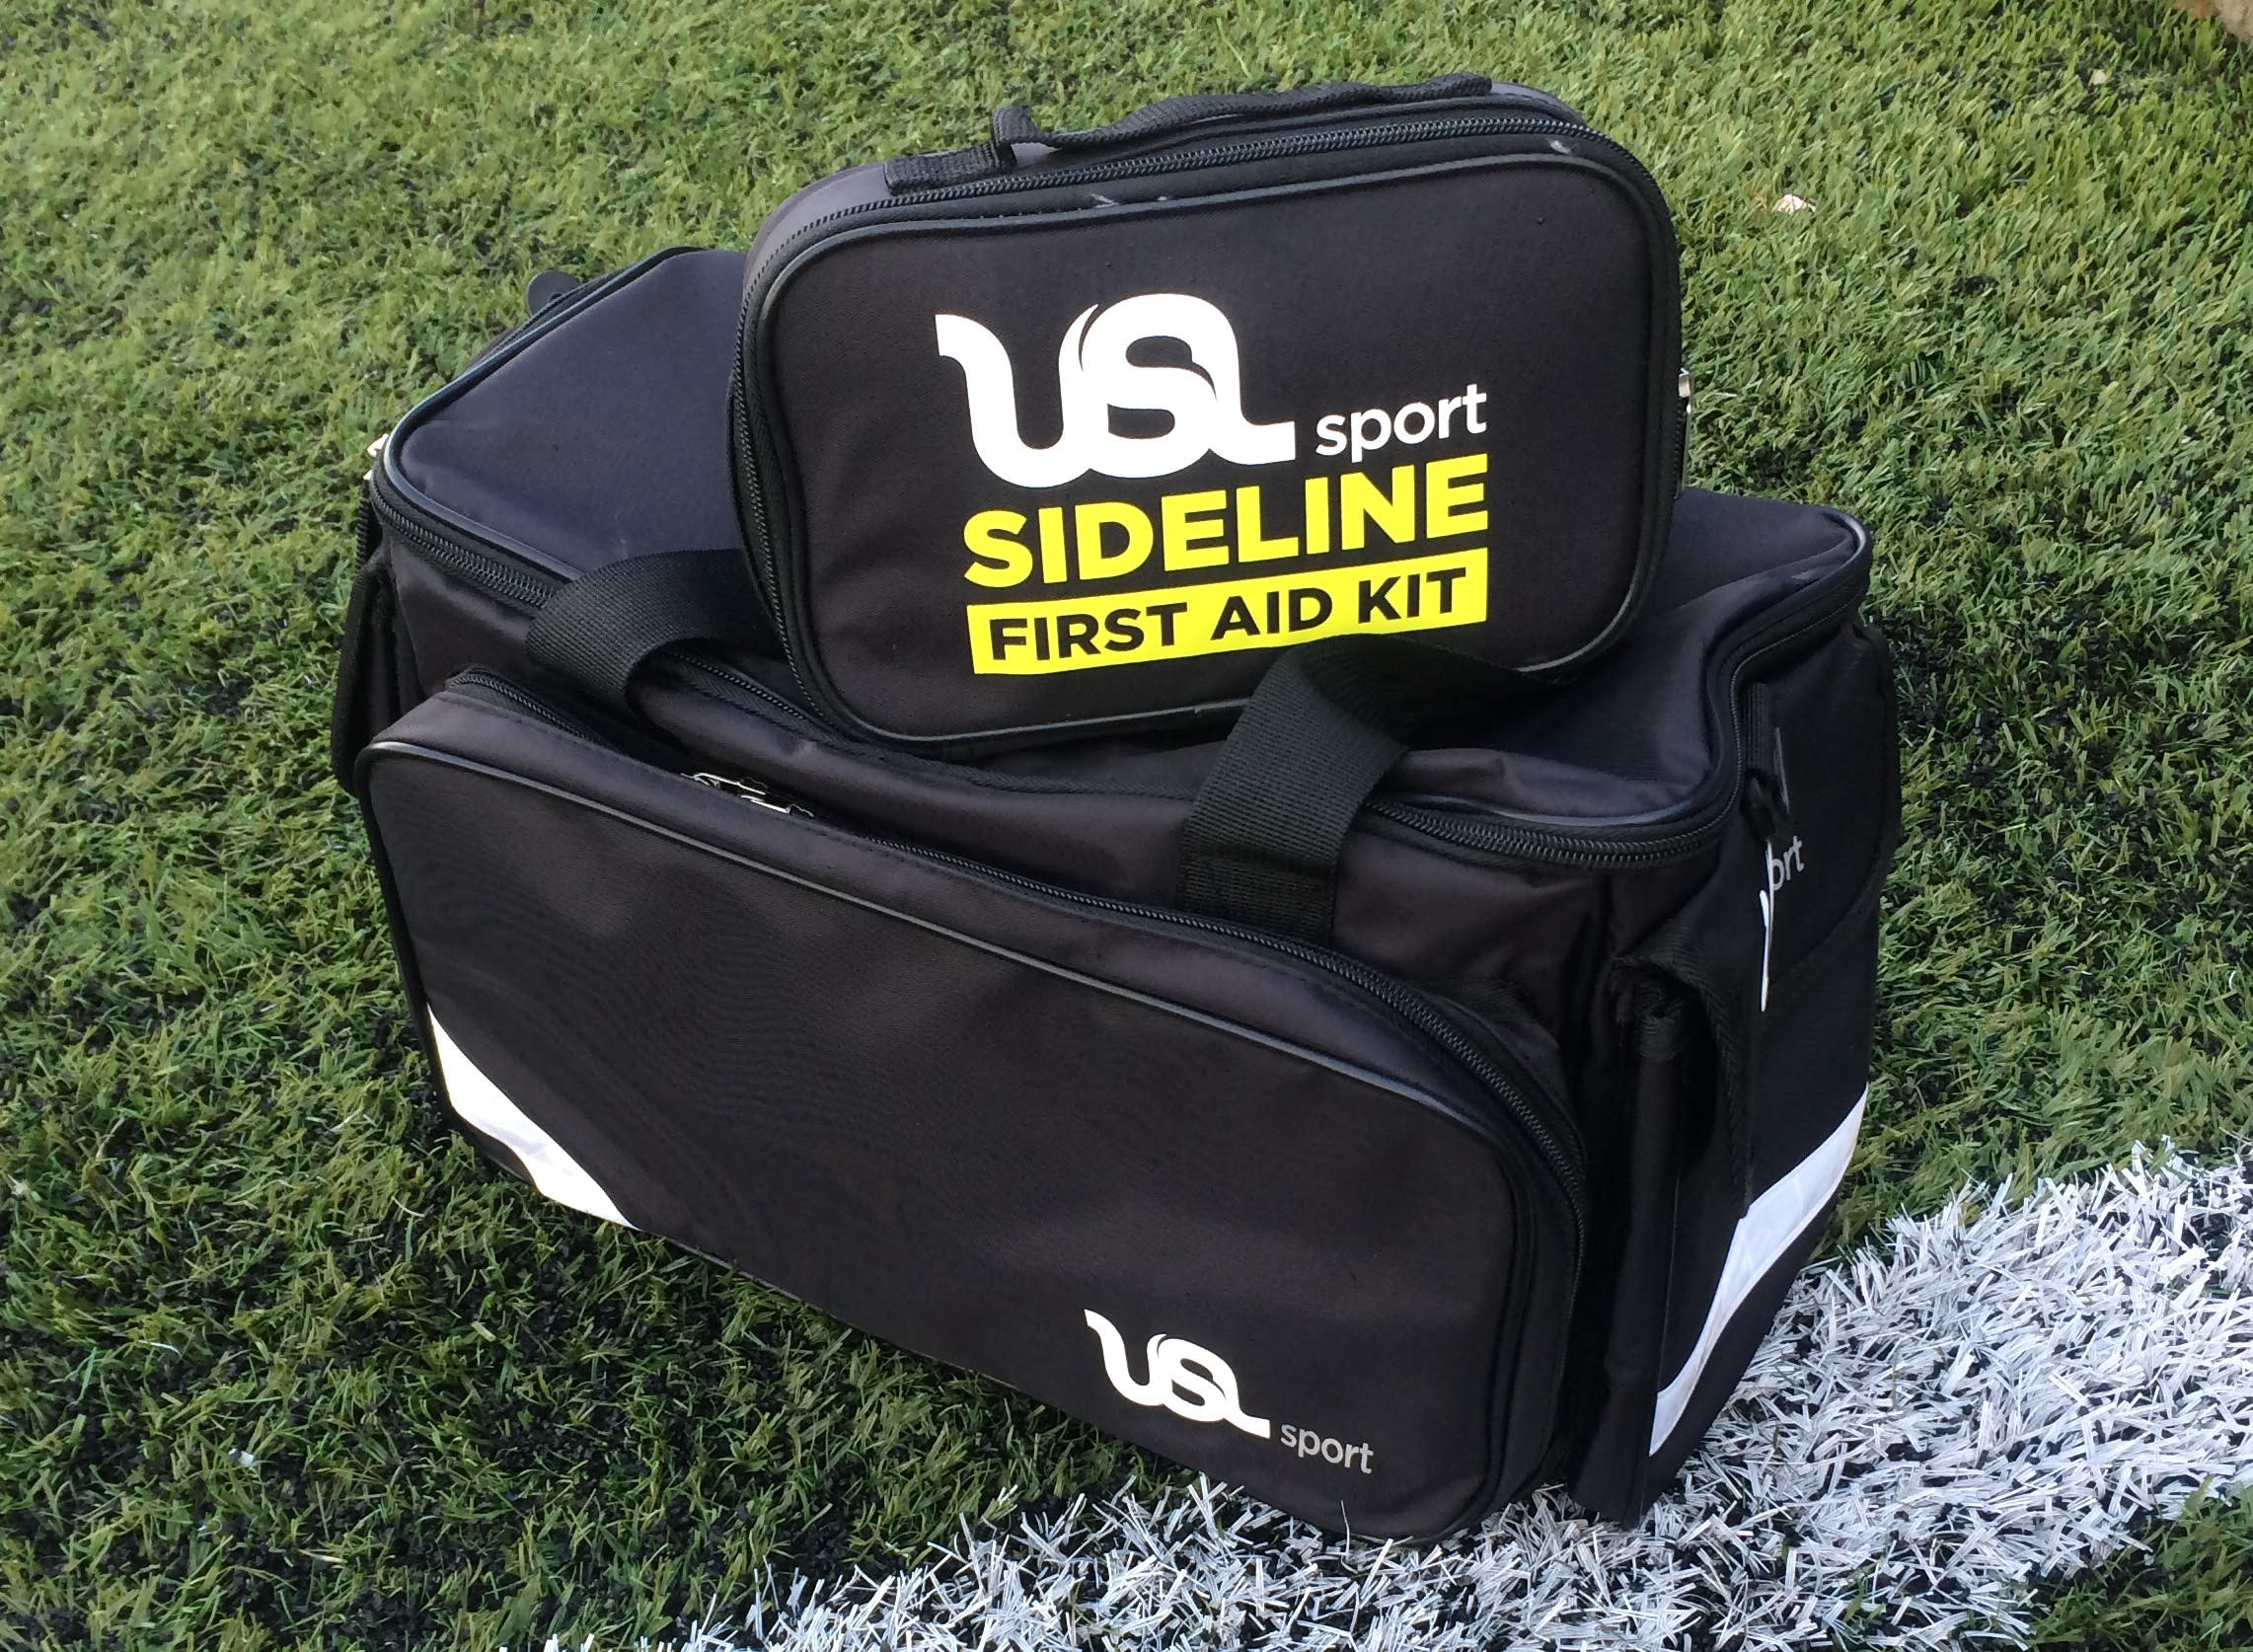
Sideline Kit

I think a good basic kit should contain:

  • CPR mask and resuscitation card x 1
  • Survival blanket x 1
  • Scissors stainless x 1
  • Gloves x multiple
  • Management of blood products
    Plasters Assorted water proof x 25 / gauze swab 7.5cm x 7.5cm / Sterile island dressings 7.2cm x 5 cm / Steristrips / non adherent wound pads 5cm x 7.5cm / swimming cap for head wounds / sealable bag to dispose of items with blood on
  • Wound cleansing wipes x2
  • Saline solution x 3
  • Antiseptic cream
  • Strapping materials
    38mm Rigid tape / 25mm rigid tape /50mm EAB / 75mm EAB
  • Compression bandages
    Coban 75mm / coban 50mm /tubigrip
  • Blister management materials
    Second skin / blister plasters assorted sizes
  • Vaseline / sports lube
  • Massage Lotion / massage wax / warm up rub
  • Cold spray / magic water
  • Sunscreen
  • Triangular bandage / Sling
  • Instant ice packs
  • ?Players medications / panadol
  • Sport specific tools
    Laces / studs / stud tightener / spare shinpads
  • Pocket Concussion Recognition Tool
  • Business cards for BTYF Physio

It takes a while to get a good kit together, and once you have created a good kit you need to remember to replace items you use.  Every team or athletes requirements are often slightly different so make a kit that suits your team perfectly and encourage athletes to take responsibility to bring the things they may need.


Loading and the growing athlete

Hey team,

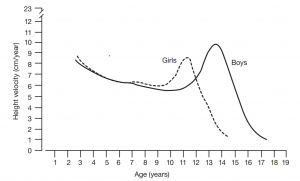
With the opportunities to be involved in organised sport at a record high for our growing children, there are also a number of young people who are suffering from pain as a result of doing their sport.  In the sporting context the term ‘loading’ refers to the amount of physiological stress placed on the body by activity.  The amount of loading in a training programme can be thought of as a ‘dose-response’ relationship, in other words you will get a response from your body depending on the dose (of exercise or loading) you do.  The body grows in a relatively linear fashion from the age of two until children hit the pubertal growth spurt.  Girls tend to undergo the pubertal growth spurt before boys (see figure 1).  If your body is growing, it is already under load from the process of growth.  Jumping, running and other sports can add more load onto the body, which can sometimes result in pain.

Peak Height Velocity (PHV) is the period when the growth spurt is happening  Females achieve their PHV earlier than males (on average for females at approximately age 12, males age 14) but there is a wide range in age from when individuals will achieve their PHV, from 9.5 to 14.5 years in females and 10.5 to 16 years in males.  This can result in different responses to the same ‘dose’ of external load applied to athletes. For example, if two children undergo the same training load but one child was at peak height velocity they may be more likely to sustain an injury or growth related pain compared to a child that was months or years away from their PHV.

Figure 1: Peak Height Velocity for American Girls and Boys

A prediction of how far an individual is from their Age of Peak Height Velocity (APHV) can be calculated from the athletes gender, date of birth, date of measurement, height, sitting height and weight, and is based on the differential growth and timing of leg length and sitting height.

The closer an individual is to APHV the more accurate the prediction. Ideally the age to make the most accurate prediction would be 9 to 13 years in females and 12 to 16 years in males.  This calculation has been shown to be accurate for white Caucasian population measured during the ages described previously.

Ensuring the accuracy of the measurements is essential, as any errors (especially in sitting height) will dramatically alter the precision of the prediction.

Knowing the APHV for individual athletes means we can tailor the loading programme for that particular athlete, during the training season and hopefully reduce pain from over-training whilst training during APHV.  This handy online calculator does the calculation for you: https://kinesiology.usask.ca/growthutility/phv_ui.php

Another source of information that is useful for those planning training sessions for adolescent athletes is the subjective assessment of the exertion required to do the sessions (the rate of perceived exertion). In other words, how difficult is the session to complete for each individual on a score from 0-20 where 0 is the easiest score and 20 is maximum possible effort.  The RPE scale is used to measure the intensity of exercise. The RPE scale runs from 0 – 20. The numbers below relate to phrases used to rate how easy or an activity feels.

Figure 2: Borg Rate of Perceived Exertion Scale

  Level of exertion  
1    
2    
3    
4    
5    
6 No exertion at all  
7 Extremely light  
8    
9 Very light For a healthy person this would be walking at your own pace for a few minutes
10    
11 Light  
12    
13 Somewhat hard Feels ‘somewhat hard’ but OK to continue
14    
15 Hard (Heavy)  
16    
17 Very hard Healthly athletes can still go on but really has to push themselves, they feel heavy and very tired
18    
19 Extremely hard This is usually the most strenuous exercise athletes will experience
20 Maximal exertion  


Using the RPE gives us feedback on how athletes are feeling.  The numbers should hopefully correlate with how hard the trainer expects the session to be.  So if the trainer was planning a light session but the athletes were recording RPE of 16 and above, then the trainer may need to reconsider his training plan.

The negative effects of overloading can be injuries, pain, fatigue, burnout, and ultimately, reduced performance, the opposite to what we are trying to achieve by training.   Sometimes the first indicator of overtraining is a higher average RPE than normal to a training session, which may indicate the athlete is overloaded and may need a longer rest period, or lighter sessions for a while.

So how can we reduce the negative effects of too much load?

  • First we need to quantify the number of sessions we are doing per week. Start by making a training diary.  Record all the organised training sessions – gym, track, other sports, PE at school etc.  However, this does not take into account the unorganised loading that our bodies undertake, such as playing with friends, skateboarding, etc., but is a good start.  (If you did include the unorganised load that would mean your calculations at the end would be more accurate).
  • We can get a subjective reflection on the amount of load that athletes feel they are under by using consistent measures over a period of time such as RPE. Subjective measures such as rate of perceived exertion (RPE) are moderately reliable if we are looking at the same subject over a period of time. Reviewing their scores and what you expected the athletes to score is important when planning future sessions so you can load the athletes appropriately.
  • Understanding when the athlete is likely to hit their APHV gives the person who is planning the loading programme, a time period where they may want to increase flexibility sessions and perhaps reduce the load during this time period for their athlete.
  • Make sessions fun, enjoyable and tailor them as best you can to each individual athlete
  • Be flexible, although it is frustrating to have planned a session and then have to change it at the last moment, we need to listen to our athletes and, if they are not prepared for the load, of the training session they may break down.
  • Make sure you encourage rest days, particularly after heavy training days. Athletes need to be allowed to load and recover so they can positively adapt to the load.


Remember we are here to help you stay on the track, on the field and enjoying your sport in a healthy manner.  Get in touch if you would like more information

Glossary of terms:

Loading

RPE : Rate of perceived exertion

PHVC: Peak Height Velocity Calculation – the approximate date the body will be growing through the fastest rate of growth.

APHV (Age of peak height velocity)


References:

Lambert, M.I., Borreson, J. (2010) Measuring training load in sports. Int J Sports Physiol Perform. Sep;5(3):406-11


IAAF specific considerations for the child and adolescent athlete https://www.iaaf.org/download/download?filename=538bb448-c750-452d-b01a-144b10a51aa6.pdf&urlslug=Chapter%204%3A%20Growth%20and%20Development

Mirwald, R.L., Baxter-Jones, A.D.G., Bailey, D.A., Beunen G.P. An assessment of maturity from anthropometric measurements. Medicine and Science in Sports and Exercise 2002: 34(4); 689-694

https://kinesiology.usask.ca/growthutility/phv_ui.php

Ross WD, Marfell-Jones MJ. Kinanthropometry. In MacDougall JD, Wenger HA, Green HJ, eds. Physiological Testing of the High-Performance Athlete, pp 223-308. Champaign, Illinois: Human Kinetics Books, 1